How do you complete The Tomb main quest in Black Ops 6 Zombies? As most seasoned fans know by now, each Zombies map comes with a huge main questline that can be played through with or without a group of people. Completing the quest without any help can be a real pain, luckily we're here to help guide you through The Tomb.
First off, it's worth mentioning that this story is a direct continuation of the BO6 Directed Mode in-game.

Here are the steps to complete The Tomb main quest in Black Ops 6:
- Find your way to the Subterranean Temple
- Open the Doorway to Nowhere
- Obtain the Monocle
- Destroy purple crystals to trigger constellations
- Shoot symbols on the constellations
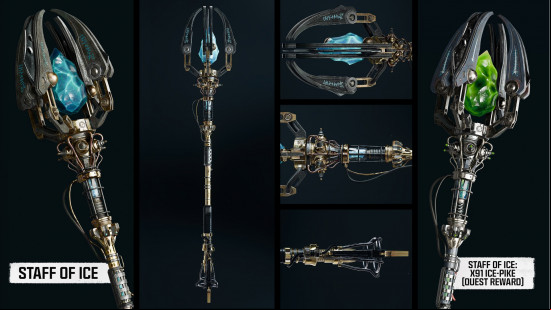
- Craft the Staff of Ice
- Shoot crystals with the Staff of Ice
- Shoot rocks in the Dark Aether
- Find the other side of the closed door
- Follow the purple orb
- Use the Ull's Arrow to defeat different enemies
- Prepare for and trigger the boss fight
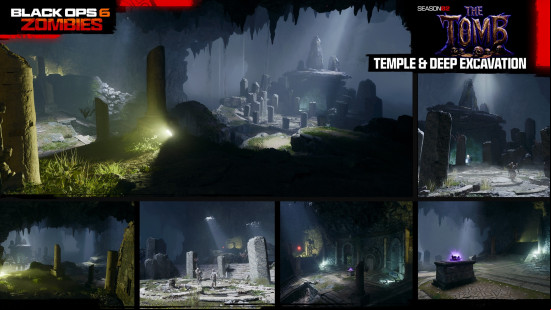
Find your way to the Subterranean Temple
As with other BO6 Zombies maps, you need to open the door using Essence until you reach the underground area. Fortunately, this part is directed as standard, so you know roughly where to head. The doors are marked with glowing red runes, and there are three between you and the Subterranean Temple. Financially, this will take you until around round six.
Open the Doorway to Nowhere
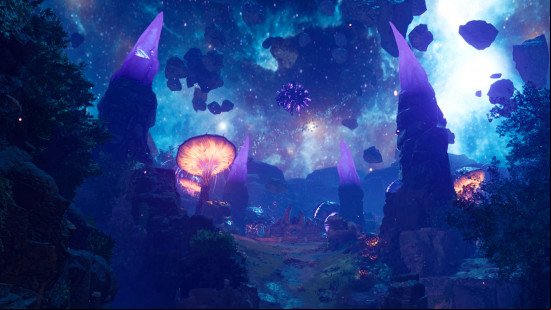
In the Subterranean Temple, head to the sarcophagus marked by a glowing crystal on top. Interact with this to place the amulet from the Citadelle des Morts quest. Don't worry, it's part of the story, so you have it even if you never completed this quest. This opens the Door to Nowhere behind the sarcophagus, leading to the Dark Aether.
Obtain the Monocle
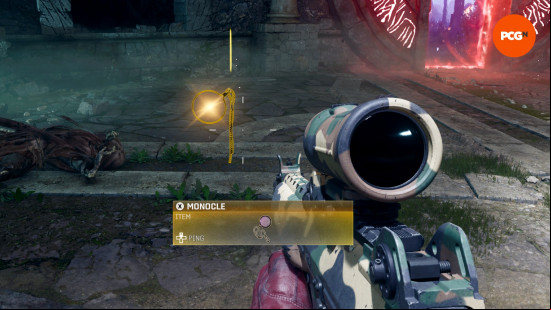
This is the first step to crafting the Staff of Ice Wonder Weapon. If you have a Wonderbar! BO6 Gobblegum, you can try to obtain the weapon from the Mystery Box. In fact, you might even be lucky enough to get it without the Gobblegum, but you shouldn't waste too much Essence trying. Instead, follow these steps to build the Wonder Weapon.
Firstly, you need to get to round eight, that's when the Shock Mimic begins to spawn. The Shock Mimic is carrying a Monocle that you need to construct the Staff of Ice.
Destroy purple crystals to trigger constellations
You may have noticed that purple crystals spawned throughout the map when you placed the amulet in the earlier step. You can find one of these crystals by Hunter wall painting, and another by the Bull wall painting. These crystals swap locations when destroyed, so if there's no crystal near the paintings, simply destroy other crystals nearby until they are where you want them.
The Hunter wall painting is located in the Neolithic Catacombs and will light up like a constellation once the correct purple crystal. Repeat this for the Bull painting in the Tombs.
Shoot symbols on the constellations
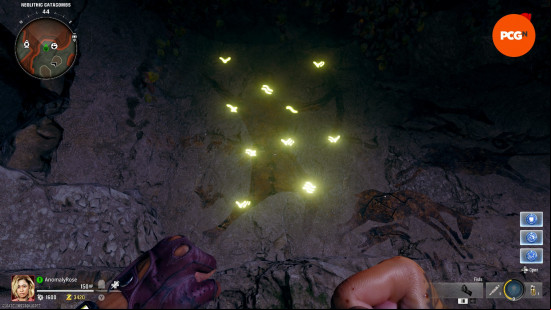
For both the Bull and Hunter constellations, you must shoot the glowing symbols in the correct order. Taking a closer look at the symbols reveals they are alternate Roman numerals, and you must shoot them in order from one to ten (Bull) or 12 (Hunter).
| Number | Numeral |
| 1 |  |
| 2 |  |
| 3 |  |
| 4 |  |
| 5 |  |
| 6 |  |
| 7 |  |
| 8 |  |
| 9 |  |
| 10 |  |
For each of the two areas, having shot the symbols, you must defeat four waves of enemies. For each, you're rewarded with a part of the Staff.

Craft the Staff of Ice
With these two parts and the monocle in your inventory, head down to the Dark Aether Nexus (behind the Door to Nowhere we opened earlier) and interact with the circular hole in the central wall. It takes some time for the Staff of Ice to be crafted, and you must protect the weapon from enemies during this time.
Shoot crystals with the Staff of Ice
Head back to the Subterranean Temple area and shoot three different purple crystals, this time with the Staff of Ice. The trouble here is that you must shoot any three crystals but within a very brief period of time, roughly ten seconds. As such, you may want to use your normal gun to shoot crystals until three appear close enough together.
As we mentioned earlier, shooting these crystals causes them to reappear elsewhere, so you can use this to force better spawn locations, you can then shoot them with the Wonder Weapon to freeze them. If successful, this triggers a dialogue line from Sir Archibald Fotherington-Smythe.

Shoot rocks in the Dark Aether
Once you hear Sir Archibald, head back into the Dark Aether where three of the floating rocks above you should now have purple glowing symbols on them. Firstly, take note of which symbols you see as you will need them later. Shoot each of them with the Staff of Ice in any order, and one of the four doors in the Dark Aether Nexus will close.
Find the other side of the closed door
Back inside the tomb, find which of the four doors closed. It will either be behind the sarcophagus in the Subterranean Temple, near the Stamin-Up machine, near the Quick Revive, or near spawn. On the door, there will now be eight glowing symbols. Shoot the three that match the ones you shot earlier on the floating rocks, and head back into the Dark Aether Nexus through that same door once more.
Follow the purple orb
You now spawn in the Dark Aether Nexus near a large purple orb. Interact with this and then follow it, staying as close as possible to the orb while surviving and killing enemies. Killing enemies is essential for charging the orb until it reaches its final destination, where it was originally crafted.
Here, interact with the orb while holding the Staff of Ice to upgrade it to the Ull's Arrow. If you lose the orb during this sequence, it will float into the sky and disappear. Survive to the next round and head back to the door, and shoot the symbols again to re-trigger the section.
Use the Ull's Arrow to defeat different enemies
Once you have upgraded the Staff of Ice, four different powers appear on your screen with their corresponding keys. Using Sekhmet's Vigor, you must now complete different enemy waves, triggered from different statues in the Dark Aether.
Parasite
Using the Staff of Ice, shoot the yellow crystal in the Parasite statue. Collect the crystal, and head through the yellow door. On the other site, place the crystal in the statue and survive the round.
During the round, shoot the Parasites charged with energy to collect the orbs they drop on death. Feed these orbs into the statue as you go until the round is complete. Pick the crystal back up again, and return it to the Parasite statue in the Dark Aether. For each of these steps, you can drop the crystal if you take too much damage, so try to avoid zombies on the way back. If you do, it returns to the podium, so you can just try again.
Vermin
Shoot the blue crystal with the Staff of Ice in the Vermin statue. Again, collect the crystal, this time taking it through the blue door. Here, place the crystal in the statue, and survive a wave of Vermin. When the round is complete, pick up the crystal and return it to the statue in the Dark Aether.
Doppelghast
Follow the same steps on the green Doppelghast statue, heading through the green door. This round's tough, but survive and defeat the Doppelghasts, while also avoiding the lasers and spikes on the ground, and return this crystal to its statue in the Dark Aether.
Amalgam
Yep, you're doing it once more, this time with the red Amalgam statue and the red door. Defeat the Amalgam, which periodically shields itself using a nearby Zombie. Defeat that zombie to make the Amalgam vulnerable to attack once more.
Prepare for and trigger the boss fight
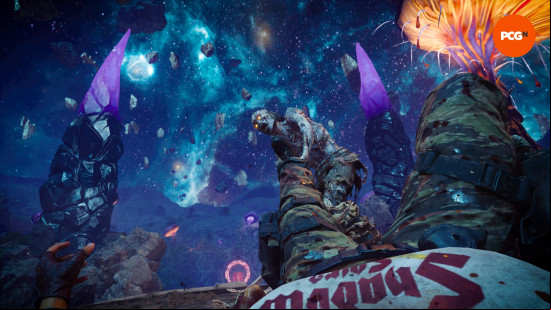
At this point, lasers will lead you to a broken wall. Interacting with this wall takes you across a bridge to the Sentinel Artifact. Be careful as this artifact will trigger the boss fight, so ensure you and your team are prepared before you continue.
This boss fight is a long one. First, there are a few phases in which the Sentinel Artifact shoots out lasers. Simply avoid these lasers as you can't do damage to the Artifact yet. After a while, the Artifact turns purple to indicate that it's vulnerable. Break the Artifact and it will start to shoot lasers against once it returns to an orange color. Repeating this process causes an additional Artifact to spawn in. During the damage phase, you only need to break one Artifact, but you can break more if possible to deal more damage and skip phases.
After about four of these phases, things change. Now, an Artifact is attached to a Heavy Zombie while lasers are still rotating in the central area. Defeat the Heavy Zombie and destroy the Artifact it drops while avoiding the beams. You're going to have to repeat this process twice before the next phase triggers.
Next, instead of a Heavy Zombie, it's a Doppelghast. From here, these Elite Zombies can instakill you, so be very careful and ensure you prepped thoroughly with Perks and armor. After the Doppelghast, it's a Shock Mimic, and then an Amalgam. For each of these, again, kill them and destroy the Artifact they drop to deal boss damage.
Now, you're at the final stage. Fail this, and you can't retry it without doing the entire process again. All the Artifacts now align in the center of the Dark Aether, and one will pull away, floating off slowly. This is the one you need to destroy, and you must do so before your time runs out. For all of this, including the earlier stages, Aether Shroud is the perfect field have, as you can concentrate solely on attacking the Artifact and not have to worry about the enemies around you. Destroy the Artifact in time and interact with it once it respawns back in the center of the area to trigger the final cutscene and complete the quest.
BO6 The Tomb main quest rewards
The rewards available for completing the BO6 The Tomb main quest are:
- 5,000 XP
- X91 Ice-Pike Staff of Ice skin
- A Calling Card, with a unique variant available for those who complete the quest before Directed Mode is added
That's everything you need to complete The Tomb main quest in Black Ops 6 Zombies. Whether you've manage to complete the quest or not, there are plenty of other BO6 battle , including this season's new weapons.
