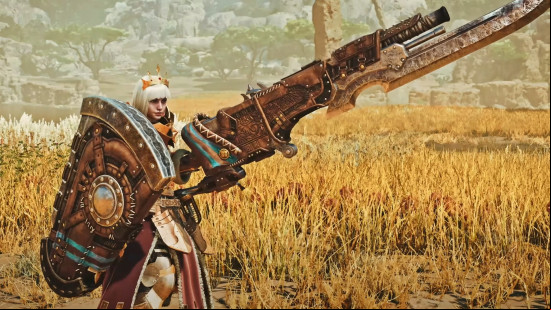
What is the best Monster Hunter Wilds Gunlance build? If you like the look of the Lance but want to give it a bit more oomph, look no further than the Gunlance. This boomstick amounts to a cannon with an enormous bayonet strapped to it, and hunters wielding it can switch seamlessly between melee and artillery fire.
The Gunlance is one of the most accessible MH Wilds Charge Blade. This latest iteration of the Gunlance is more explosive than ever, so here's how to effectively use this highly popular boomstick with our best build.

Best Monster Hunter Wilds Gunlance build
The best build for the Gunlance is:
- Primary Weapon: Lawful Bors (Gunlance)
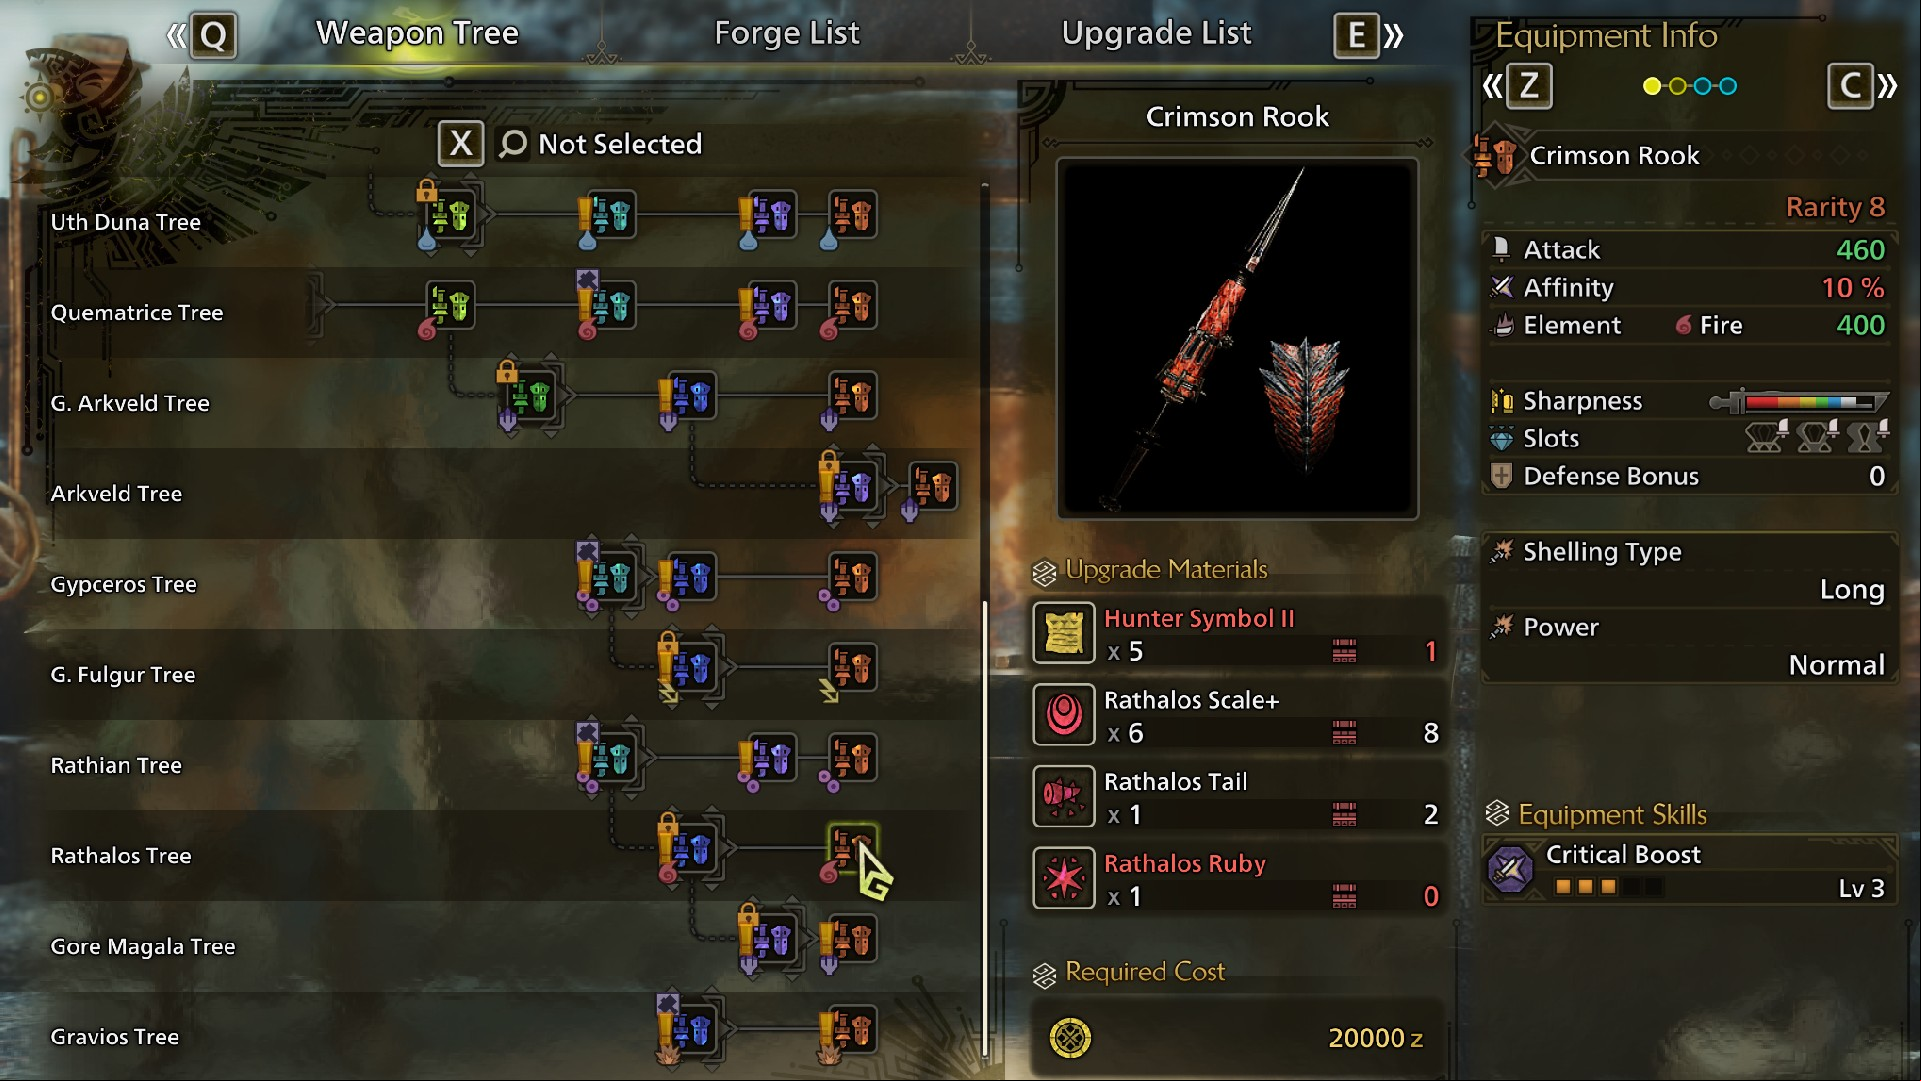
- Secondary Weapon: Crimson Rook (Gunlance)
- Armor: Rathalos Helm B (Head), Rathalos Mail (A) (Chest), Rathalos Vambraces A (Arms), Balahara Coil B (Waist), Rathalos Greaves B (Legs)
- Decorations: Focus Jewel(s), Artillery Jewel(s), Protective Polish Jewels(s), Handicraft Jewel(s)
- Talisman: Blessing Charm
- Mantle: Evasion Mantle
- Equipment Skills: Evade Window, Constitution, Adrenaline, Critical Boost, Guard, Artillery, Focus, Artillery, Protective Polish, Handicraft, Divine Blessing
Our best Gunlance build opts for long shelling over normal or wide, making it a good all-rounder for shooting and shelling with an additional Wyvern Fire damage boost. The best Gunlance for the job is Crimson Rook, a long-shelling Gunlance with a white sharpness damage multiplier and a 10% affinity boost right out of the box. Bonus crit chance is always a blessing, but the Crimson Rook's built-in Critical Boost skill ensures that when those affinity-boosted Wyvern Fire strikes hit, they hit hard.
The only major drawback to the Crimson Rook is its combination damage type, which is split between raw and fire. To mitigate this, we've paired our star Gunlance with… another Gunlance! Lawful Bors is a long-shelling Gunlance that dishes out raw and dragon elemental energy, and like the Crimson Rook, it benefits from white sharpness. While you'll be trading in Critical Boost for Guard, the knockback and stamina loss reduction while blocking with your shield makes Lawful Bors a great defensive option.
The Rathalos armor set is a clear winner for the long-shelling Gunlance, offering a combination of Constitution, Evade Window, and Adrenaline Rush. Together, these skills extend your dodge vulnerability, mitigate stamina depletion while evading and blocking, and temporarily increase your attack power after a well-timed evade. This transforms any Gunlance into an evasive powerhouse – and that's not all. With three Rathalos armor pieces equipped, you also get a fire damage buff via Scorcher, the Rathalos's Flare set bonus skill. The Balahara Coil B (Waist) adds a final Evade Window level to this build, but its two decoration slots are its main attraction.
Since Wyvern Fire is the mainstay of long-shelling Gunlances, Focus is a must-have skill. Stack up on Focus Jewels across both weapons to cut down your Wyvern Fire charge times. Artillery Jewels are also essential to any Gunlance build, bolstering the explosive power of your shells and Wyvern Fire. Top off your decorations with Protective Polish Jewels or Handicraft Jewels to protect against sharpness loss.
We've opted for the Evasion Mantle to capitalize on all the evasion we've pumped into this build. The Blessing Charm talisman slots alongside it, with the Divine Blessing skill's damage absorption to keep you alive and kicking after a mistimed dodge.

How to use the Monster Hunter Wilds Gunlance
The Gunlance boasts excellent range, and its moveset comprises mid-range melee and artillery fire. The Gunlance isn't as agile as the MHWilds Sword & Shield, but there's enough movement built into its attacks to press an advantage. Use Sidestep or Moving Wide Sweep to reposition or disengage quickly.
Like the regular MHWilds Lance, the Gunlance also includes a massive shield to guard against attacks. This shield provides the strongest block in Monster Hunter Wilds, making the Gunlance an outstanding weapon to master perfect guard – to follow up with Overhead Smash and Burst Fire once you've got the hang of it.
The Gunlance's moveset has various melee attacks, but you should consider these as openers for combos that tap into its formidable firepower. The most reliable attack rotation consists of Lunging Upthrust, Overhead Smash, and Burst Fire. Temporarily switch back to melee for a Wide Sweep and Quick Reload, then back to Overhead Smash, and so on.
This rotation lets you apply constant pressure and artillery without being forced to perform a manual reload. If you need to reposition, you can switch out the Wide Sweep for a Sidestep instead, making this rotation a little snappier. If you're up against an agile monster and need the speed to match, use the Wide Sweep as a springboard to Wyrmstake Full Blast for a devastating double-blast.
That brings us to finishers. The Gunlance's Wyvern Gauge is split into two segments, and at least one must be filled to use Wyvern's Fire, a powerful explosive shot. Alternatively, Focus Strike – Drake Auger transforms the Gunlance into a close-range drill. It also has a long wind-up animation and a short range, so save it for when a monster is temporarily knocked down and use the Monster Hunter Wilds focus mode to target wounds and weak points.
This wraps up the basics on how to use the Gunlance, but it's also important to note that the performance of this powerful boomstick varies on each Gunlance's shelling type. Normal Shells provide more ammo capacity, whereas Wide Shells empower Wyvern's Fire and Long Shells empower the Wyrmstake Cannon. Use these to adjust your playstyle once you settle on your favorite Gunlance combos.

Monster Hunter Wilds Gunlance moveset
Here are all the moves and combos for the Gunlance:
- Lateral Thrust I: A forward thrust that can chain into Lateral Thrust II and Wide Sweep.
- Wide Sweep: A diagonal upward slash from right to left, with an optional follow-up shot from the Wyrmstake Cannon. Move in any direction to perform a Moving Wide Sweep instead.
- Lunging Upthrust: Step forward and perform a rapid upward thrust with an optional chain into Overhead Smash.
- Rising Slash: A stationary version of the Lunging Upthrust with an optional chain into Overhead Smash.
- Overhead Smash: A forward-facing vertical chop following an upward thrust with an optional chain into Wide Sweep or Burst Fire.
- Shelling/Charged Shelling: Expend a single shell while moving or stationary, with an optional charge to fire all shells.
- Burst Fire: Expends all your shells in a single blast.
- Wyrmstake Cannon: Fires the Wyrmstake Cannon after a Wide Sweep.
- Wyrmstake Full Blast: Expends all your shells in a single blast that you can chain into a Multi Wyrmstake Full Blast.
- Multi Wyrmstake Full Blast: Automatically reloads and immediately expands all your shells in an additional blast.
- Wyvern's Fire: Must fill the Wyvern Gauge to use.
- Focus Strike – Drake Auger: Load a wyvern stake and drill into a monster. Inflict upon wounds or weak points to extend the attack and trigger an optional follow-up black from the Wyrmstake Cannon.
- Sidestep: Quickly hop in any direction.
- Guard: Bring up your shield to block against incoming attacks. Time it correctly to perform a Perfect Guard.
- Reload/Quick Reload: Manually reload your shells. Perform mid-combo for a Quick Reload.
Now that you're a crack shot with the Gunlance, prepare to take on the most formidable MH Wilds leveling guide to help you unlock weapons at higher rarities.
